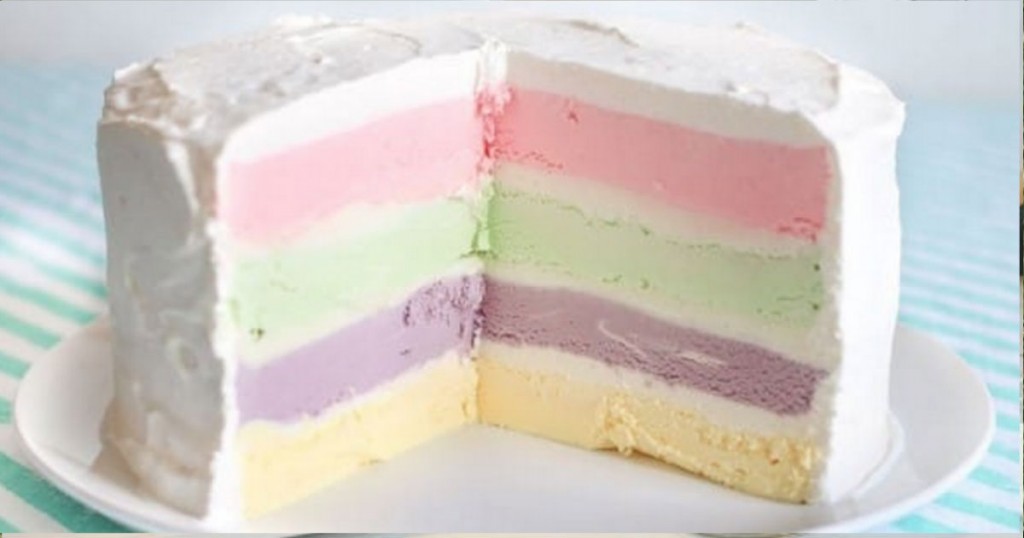
For your next birthday celebration, don’t just make cake…make ICE CREAM CAKE! And with a few extra ingredients (and a trick up your sleeve) you can make this beautiful rainbow colored ice cream cake in no time at all!
Here is what you’ll need:
- Two 2×8-inch cake pans, round (very important they are minimum 2″ high)
- Aluminum foil
- Hand mixer
- A few bowls
- Spatula
Ingredients for the cake:
- (2) 1.5 quart containers of vanilla ice cream
- (4) packets of Kool-Aid (4 different flavors/colors of your choice)
- 1/2 cup whipping cream
- Food coloring as desired to increase the saturation of the colors
Ingredients for the white chocolate ganache:
- 16 oz. white chocolate chips
- 1 cup whipping cream
And Icing: I used store bought; whatever flavor / color you desire.
Great – Let’s get started!!
1) Line your cake pan with aluminum foil. You’ll be building the cake in two halves, so this is why you need two pans.
2) Pick out your first two colors. Mix the Kool-Aid packets with 2 Tbsp. of heavy cream.
3) Cut your first container of ice cream in half and put each in its own bowl.
4) Mix the coloring in with the ice cream. Stir them well to combine. If it doesn’t mix initially, let the ice cream melt a little more.
5) Don’t be surprised if you have to add more coloring to the lighter colors like yellow.
6) Spread the ice cream into the bottom of your pans and get them to lay as flat as possible using a spatula. Pop them into the freezer and let them chill.
7) Now you will make your white chocolate ganache. This will be the layer between each colored ice cream ‘cake’ layer. (YUM) Here’s what it will look like.
8) Heat the whipping cream in a microwave until it’s boiling. Pour it over a bowl of the white chocolate chips. Mix them together until they’re totally combined.
9) Pop this into the freezer for about 30 minutes. Once it’s cooled, beat it with hand mixer for 3–5 minutes until it’s fluffy. Divide the ganache into three even parts.
10) If your first layers of ice cream have fully set, spread the ganache as flat as possible on top of the layers. Place the pans back in the freezer to continue to chill. Make sure you also store your ganache in the fridge until you need it again.
11) You’ve completed layers 1 & 2. Now let’s build layers 3 & 4. Repeat the same initial process. Combine your other two colors with 2 Tbsp. of heavy cream.
12) Repeat the steps from earlier with these two colors.
13) Spread these 2 new ice cream mixes over your layers of ganache and chill them again for about half an hour. {hang in there, we’re almost done!}
14) Make sure the ganache is at a temperature and consistency where you can easily mix it, then pull the two pans out of the freezer.
15) Pull the ice cream out of the pan using the aluminum foil. Apply the white ganache to the top of the bottom layer before adding the other half of the cake. {you should be looking at 4 layers of colored ice cream with 3 layers of white chocolate ganache in between each layer!}
Place the other half of the cake on top of the other layer of ganache. You can fill in any gaps with the excess ganache.
16) At this point, you can either chill the cake while you make your own frosting or you can move onto frosting it with your store-bought frosting.
**You need to do this step quickly. You don’t want the ice cream melting.
17) TA-DA! Once it is completely frosted, pop it back in the freezer for at least 30 minutes before serving. 🙂
And, when you’re ready to serve, run your knife under hot water to get a nice, clean cut. Then watch as everyone is amazed by your delicious ice cream cake.
Instructables/jessyratfink
HT LittleThings
